How to Write an Address on an Envelope
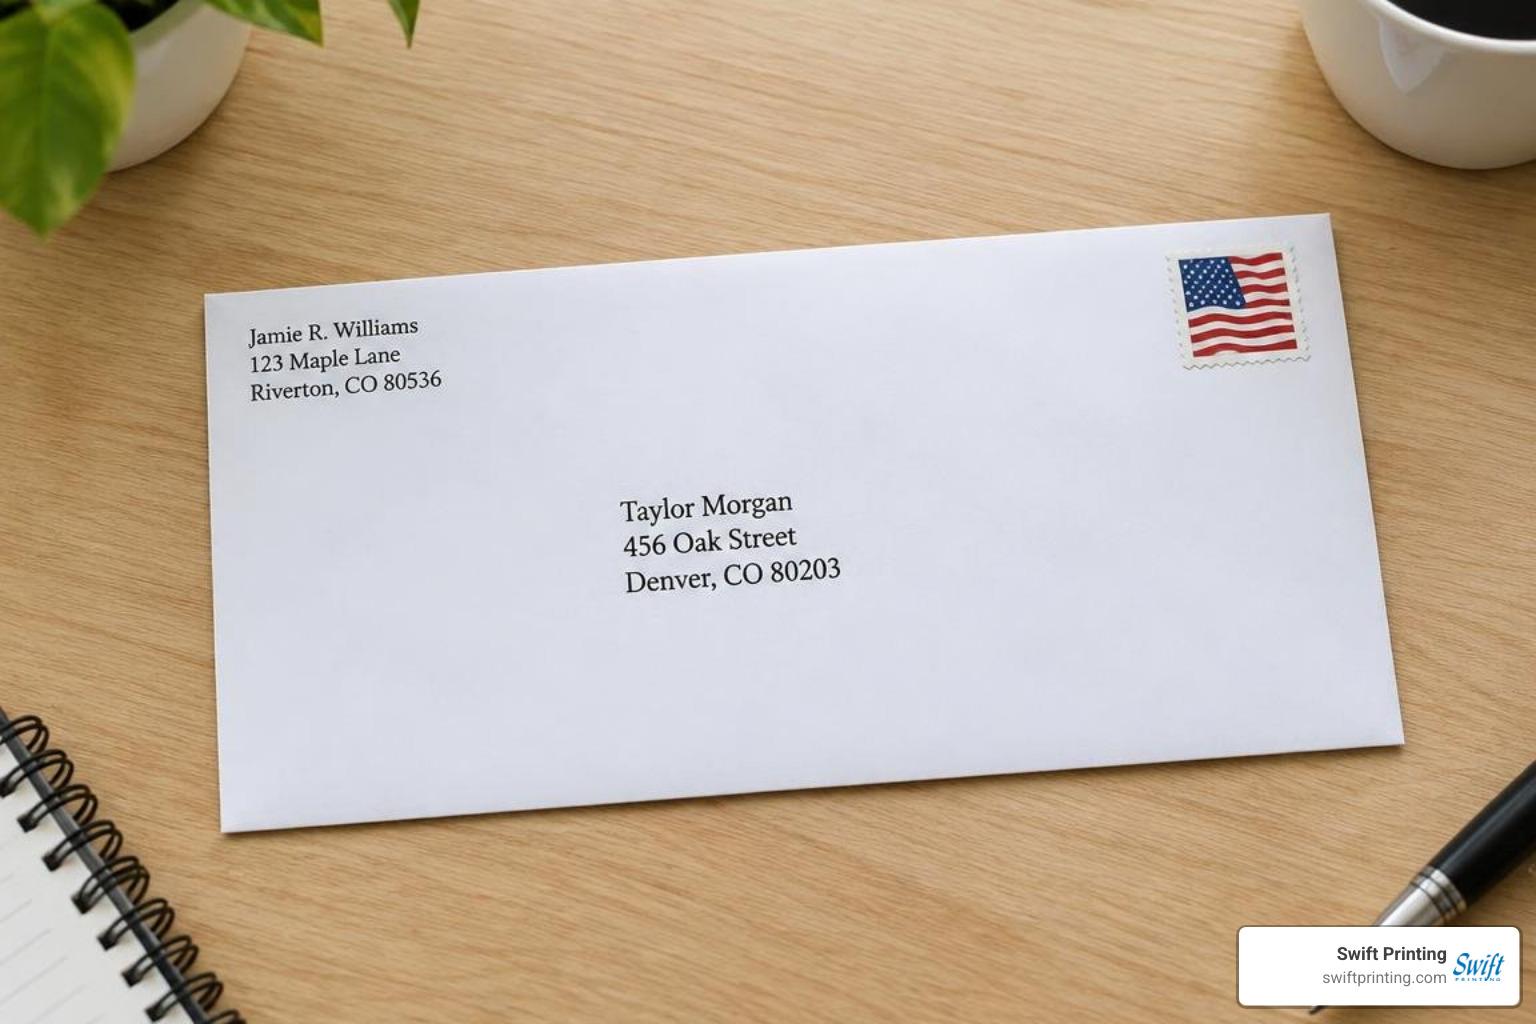
To write an address on a U.S. envelope, turn it so the long edge is horizontal. Put the recipient’s name and address in the center of the front, your return address in the upper left, and the stamp in the upper right. Include the recipient’s street address, apartment or suite number if needed, and city, two-letter state abbreviation, and ZIP code. Use clear, dark writing or a printed label.
I’m Jessica Gutowski-Slaydon, president of Swift Printing in Grand Rapids, where I work with clients on envelopes and direct mail. That experience helps me answer writing address in envelope questions with practical advice for mail that looks professional and is easy to read.
Every single day, high-speed sorting machines across the United States process over 425 million pieces of mail. Optical Character Recognition (OCR) scanners read those envelopes in milliseconds, directing them toward delivery trucks, cargo flights, and letter carriers. If an address is misplaced, written in faint ink, or structured incorrectly, sorting cameras can misread the information. The letter then gets diverted to manual sorting or sent on an unintentional detour.
For professional organizations, medical practices, legal practices, and corporate consultancies, pristine mail delivery isn't just about speed—it is the baseline of professional credibility. Let’s walk through the exact layout standards, technical formatting rules, and real-world best practices to ensure every envelope you send arrives without delay.
Standard Anatomy and Rules for Writing Address in Envelope Layouts
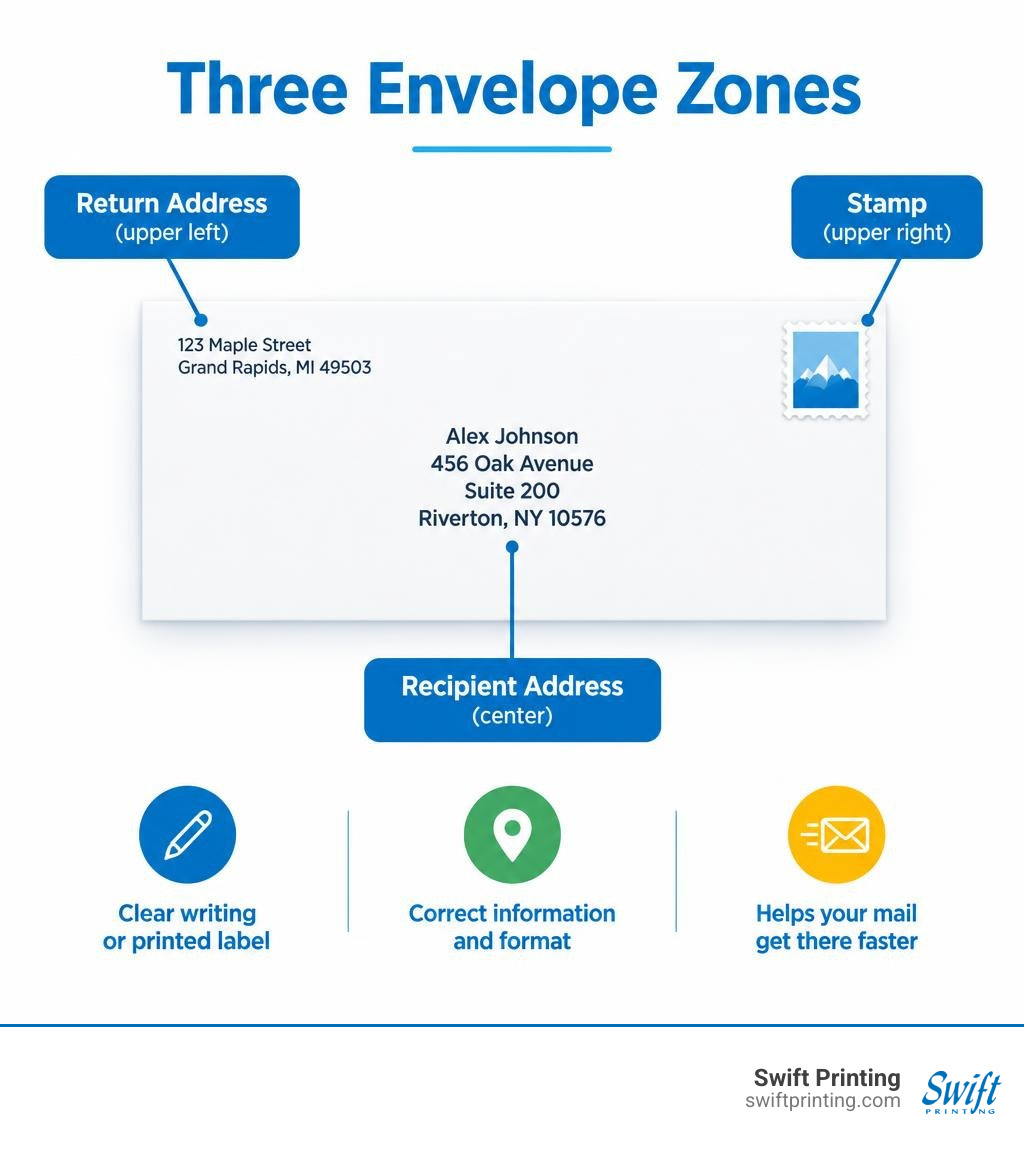
Achieving flawless delivery begins with understanding the geometric anatomy of your mailpiece. Every standard rectangular envelope contains three mandatory zones: the return address zone, the delivery address zone, and the postage area.
To maintain machine readability, follow these fundamental layout principles:
- Horizontal Orientation: Always position your envelope so the longest edge runs horizontally, with the flap opening at the top back.
- Parallel Alignment: All written lines must run parallel to the longest edge of the envelope. Never write addresses diagonally, vertically, or along the short edge.
- Adequate Margins: Keep at least a 1/2-inch to 5/8-inch clear margin along all outer edges of the envelope. The bottom 5/8-inch of the envelope should ideally remain blank so automated sorting systems can imprint routing barcodes.
- Proportion and Centering: The delivery address block belongs in the optical center-bottom of the envelope, occupying the space where sorting cameras expect to find it.
Understanding the structural foundation covered in our guide to envelope anatomy makes choosing the right paper stock, flap style, and size straightforward for high-end professional correspondence.
Return Address Requirements and Placement
The return address belongs in the top-left corner on the front of the envelope. This information establishes immediate sender credibility and acts as an insurance policy for your mailpiece.
Include the following elements on separate, left-aligned lines:
- Sender Name or Business Name (e.g., firm or department name)
- Attention Line or Suite Number (if applicable)
- Street Address or P.O. Box
- City, State, and ZIP Code (or ZIP+4)
While standard domestic First-Class letters can technically travel without a return address, omitting it means an undeliverable piece cannot be returned to you. For government agencies, medical facilities, and law offices handling confidential files or critical notices, an accurate return address ensures that failed deliveries are flagged immediately rather than routed to the Postal Service's dead-letter facility.
Recipient Delivery Address Layout and Formatting
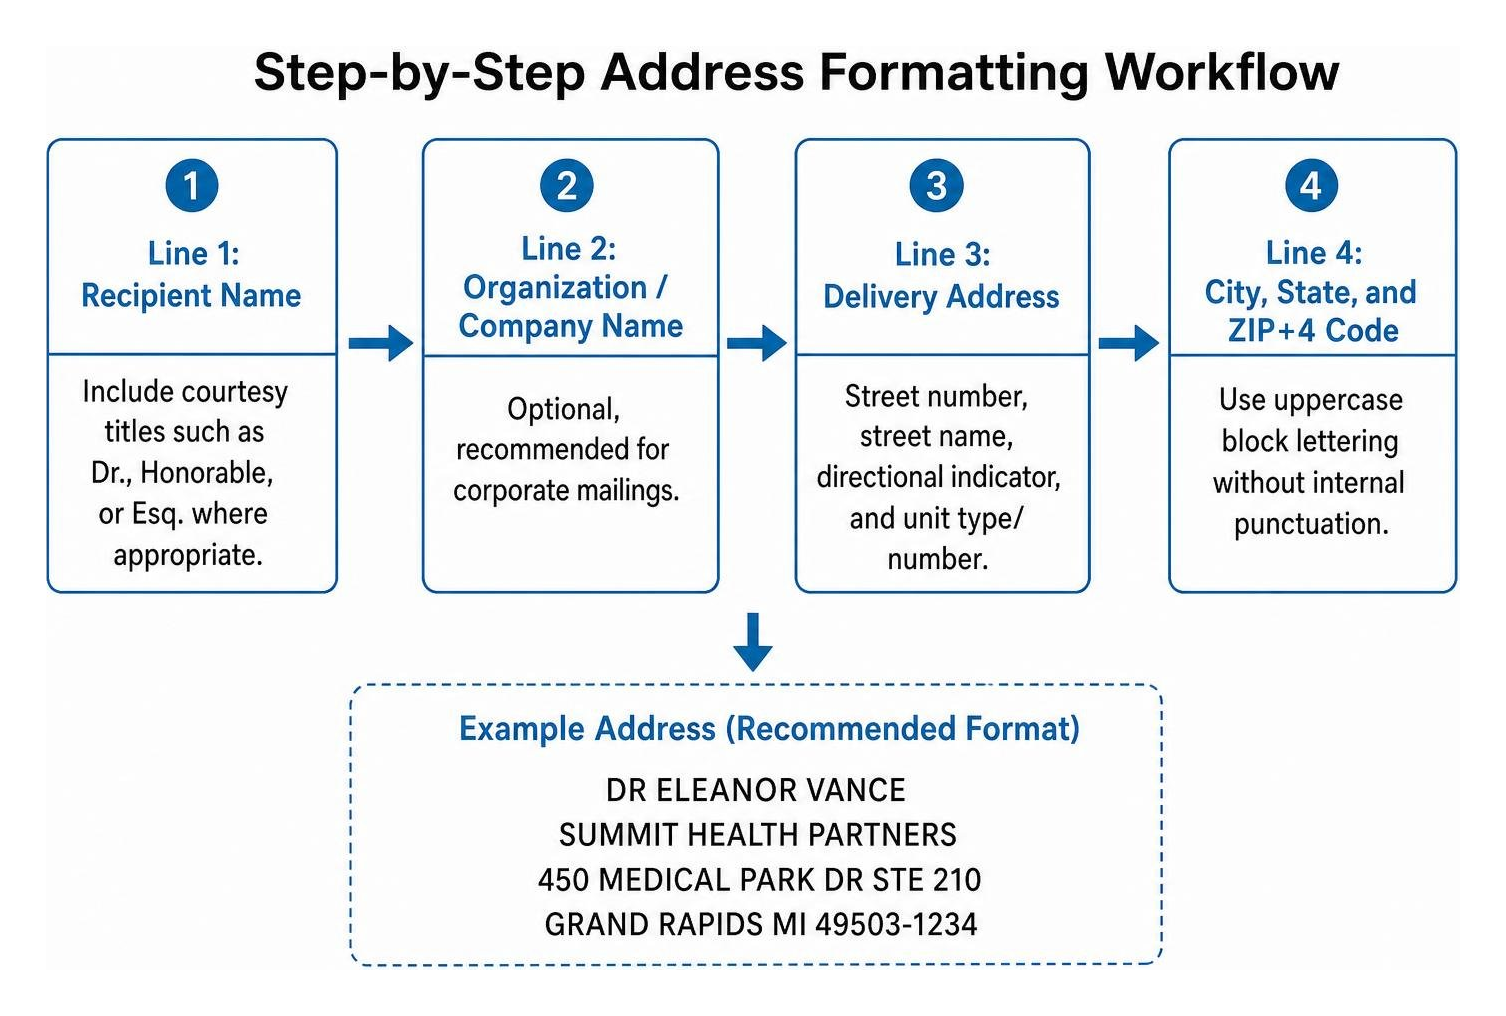
The delivery address belongs in the center-bottom half of the envelope. To maximize OCR scan accuracy, format the address block neatly across three to four lines:
- Line 1: Recipient Name (include courtesy titles such as Dr., Honorable, or Esq. where appropriate)
- Line 2: Organization / Company Name (optional, recommended for corporate mailings)
- Line 3: Delivery Address (street number, street name, directional indicator, and unit type/number)
- Line 4: City, State, and ZIP+4 Code
For automated commercial mailings, postal authorities recommend using uppercase block lettering without internal punctuation like periods or commas. Following standard address formatting guidelines keeps your mail running smoothly through high-speed sorting streams.
Step-by-Step Guide to Formatting Domestic and Specialized Mail
Different types of mail require distinct approaches. While commercial billing statements demand strict automated precision, military deployments and formal events follow specialized conventions.
Below is a comparison of standard address formats across different mail categories:
| Mail Category | Line 1 | Line 2 | Line 3 | Line 4 / Final Line |
|---|---|---|---|---|
| Domestic Business | DR ELEANOR VANCE | SUMMIT HEALTH | 450 MEDICAL PARK DR STE 210 | GRAND RAPIDS MI 49503-1234 |
| Domestic P.O. Box | ARTHUR PENDRAGON | ACME CONSULTING | PO BOX 1845 | LANSING MI 48901-1845 |
| International (UK) | MS CLARA OSWALD | 10 DOWNING STREET | WESTMINSTER | LONDON SW1A 2AA UNITED KINGDOM |
| Military (APO/FPO) | CPT JAMES MILLER | UNIT 2050 BOX 4190 | APO AE 09107 | (No country name) |
Adhering to proven mailing practices prevents transit delays across all envelope categories.
Writing an Address on an Envelope for International Destinations
When preparing correspondence for delivery outside the United States, your address format must accommodate both domestic export sorters and the destination country's postal system.
- Format According to Local Customs: Write the recipient's street name, town, and postal code according to the standards of the receiving nation.
- Include the Destination Country on the Last Line: Write the complete country name in uppercase English letters on the final line by itself (e.g.,
FRANCE,JAPAN,CANADA). Never abbreviate the country name. - Positioning: Maintain the standard centered placement on the envelope.
- Customs Documentation: If your international envelope contains non-paper goods, documents of intrinsic monetary value, or merchandise samples, you must attach an official customs declaration form.
For comprehensive regulations on foreign destination mail, consult the official domestic and international mailing guidelines provided by postal authorities.
Formatting Military Addresses (APO, FPO, DPO)
Sending correspondence to military personnel and diplomatic staff stationed abroad requires specialized formatting. Military mail is processed through domestic postal hubs before military transport routes it overseas.
- Recipient Line: Always include the service member's full name, rank, and pay grade (e.g.,
SGT REBECCA TORRES). - Unit Information: Provide the specific Military Unit, PSC (Postal Service Center), or Ship designation on the second line (e.g.,
PSC 802 BOX 1234orUSS ABRAHAM LINCOLN CVN-72). - City Designation: Use
APO(Army Post Office),FPO(Fleet Post Office), orDPO(Diplomatic Post Office) in place of a traditional city name. - State Code: Use the two-letter military routing code instead of a domestic state abbreviation:
AA(Armed Forces Americas)AE(Armed Forces Europe, Middle East, Africa, Canada)AP(Armed Forces Pacific)
- ZIP Code: Provide the designated 5-digit or 9-digit military postal code.
Crucial Rule: Never write the host country or foreign city name on a military envelope. Adding "Germany" or "Japan" to an APO address causes the piece to enter international sorting channels incorrectly, causing extensive delays.
Addressing Formal Event and Wedding Invitations
Formal social correspondence, black-tie galas, charity fundraisers, and luxury wedding invitations demand elevated etiquette.
- Outer Envelope Presentation: Outer envelopes feature formal titles (
Doctor,The Honorable,Captain), fully spelled-out street suffixes (Boulevard,Avenue,Suite), and state names. Avoid abbreviations when aiming for traditional elegance. - Inner Envelope Personalization: Inner envelopes omit addresses entirely, identifying only the specific invited guests (e.g.,
Dr. Vance and Guest, orUncle Robert and Aunt Marie). Couples with Differing Last Names: List each individual on their own line, or join them with "and" on a single line depending on layout space:
Modern Inclusivity: Use contemporary courtesy titles such as
Mx.for non-binary recipients, or omit titles altogether in favor of full names for informal gatherings, as outlined in wedding invitation addressing etiquette.
Navigating Global Differences: USPS vs. Royal Mail Standards
Mailing between the United States and the United Kingdom often causes confusion due to differing postal traditions.
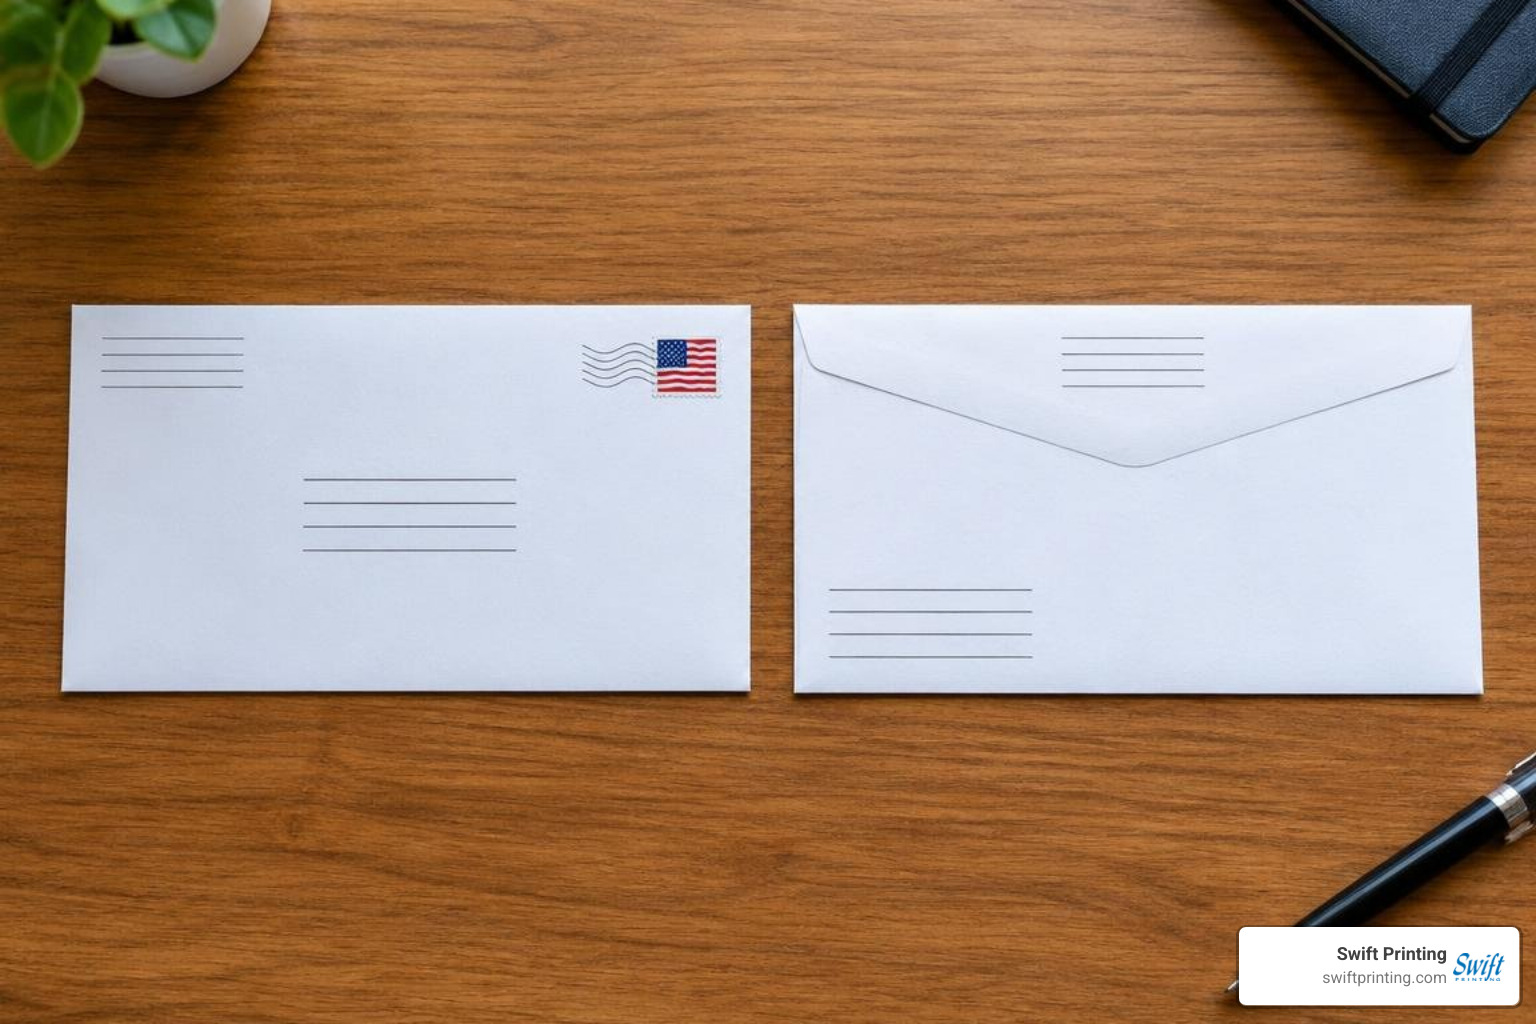
While the USPS centers the delivery address and reserves the top-left corner for the sender, the UK postal system traditionally favors a different layout:
- Recipient Address Placement: Royal Mail recommends positioning the recipient address block in the bottom-left corner of the envelope front, leaving a generous margin of at least 1/2 inch (13 mm) from the bottom and left edges.
- Return Address Placement: In Great Britain, the sender's return address is traditionally printed or written across the reverse flap on the back of the envelope. Royal Mail advises explicitly preceding the lines with the words "Return Address".
- Postcode Typography: UK postcodes follow an alphanumeric structure containing an outward code (area/district) and an inward code (sector/unit). Royal Mail requires the post town and postcode to be formatted on the last lines in all capital letters, with a clear single or double space separating the inward and outward segments (e.g.,
LONDON SW1A 2AA).
Reviewing official Royal Mail envelope guidelines ensures your British business partners and overseas clients receive their documents smoothly.
Professional Envelope Production: Handwriting vs. Machine Printing
When managing high-volume corporate communications, marketing campaigns, or patient billing, the method used to apply addresses directly impacts delivery speed, brand perception, and sorting accuracy.
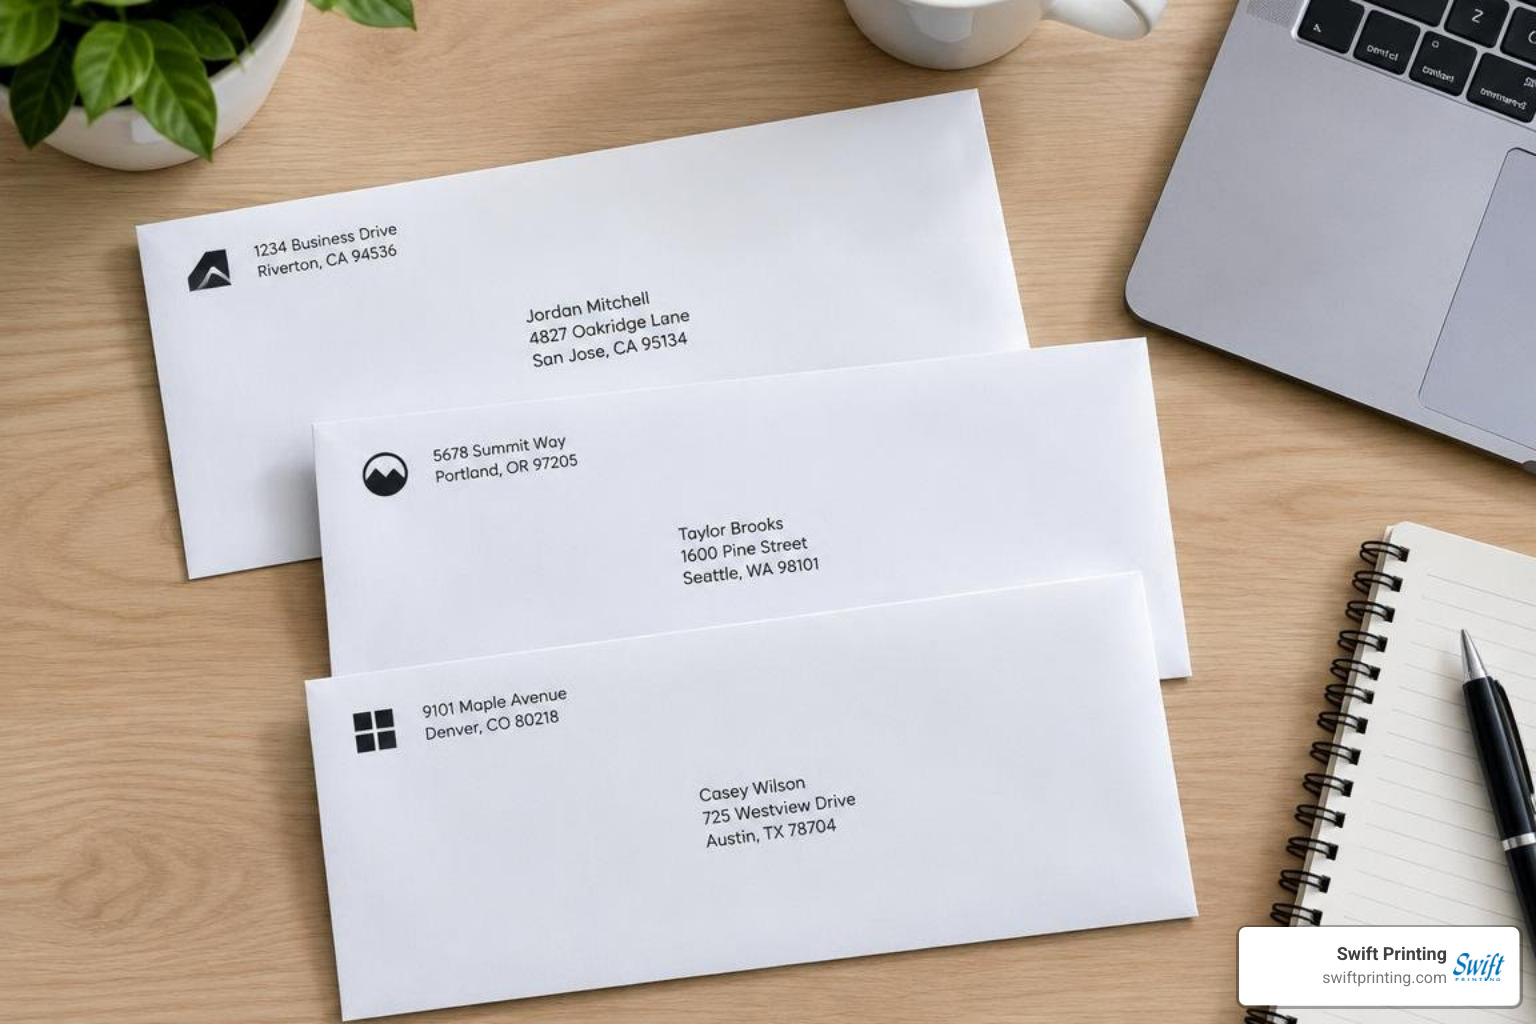
Handwritten envelopes convey personal warmth, making them an excellent choice for boutique client appreciation cards and intimate formal invitations. However, manual handwriting can introduce legibility challenges for optical sorting machines.
For commercial enterprises, high-resolution direct printing onto envelopes ensures crisp contrast, accurate margins, and reliable delivery. Implementing professional envelope printing tips allows your brand to maintain a clean, polished aesthetic while fully satisfying postal sorting criteria across every targeted direct mail campaign.
Best Practices for Writing an Address on an Envelope by Hand vs. Printing
Whether preparing an envelope by hand or setting up a bulk digital print run, apply these standards to ensure maximum readability:
- High-Contrast Ink: Use dark black or rich navy ink on light-colored paper stocks. Never use metallic gel pens, pastel inks, or faint pencils for mailing addresses.
- Typography and Font Selection: For printed envelopes, select clean, sans-serif or clear serif typefaces (such as Arial, Helvetica, Roboto, or Times New Roman) sized between 10 pt and 15 pt. Avoid elaborate script fonts, heavy decorative calligraphy, or condensed lettering for delivery text.
- Handwriting Guidelines: When handwriting addresses on colored or heavy stationery, use a light box template or a faint pencil guideline (erased after inking) to keep address rows straight and parallel to the bottom edge.
- Data Organization: For commercial print runs, keep your contact records organized cleanly in structured columns. Review our tutorial on formatting spreadsheets for mailing lists to keep your database ready for direct-to-envelope printing.
Envelope Sizing, Machine Processing, and Extra Services
Proper addressing must be paired with accurate envelope sizing and appropriate postage validation.
Envelope Dimensions and Machinery Compatibility
To qualify as a standard, machinable letter, an envelope must meet these criteria:
- Shape: Rectangular (aspect ratio of length divided by height must fall between 1.3 and 2.5).
- Minimum Dimensions: 3-1/2 inches high by 5 inches long by 0.007 inch thick.
- Maximum Dimensions: 6-1/8 inches high by 11-1/2 inches long by 1/4 inch thick.
- Standard Business Envelope: The #10 commercial envelope (4-1/8 inches by 9-1/2 inches) is the industry standard for invoices, legal notices, and corporate letters.
Understanding Nonmachinable Characteristics
Envelopes that cannot pass smoothly through high-speed mechanical rollers are classified as nonmachinable. These items require manual processing, which can add processing time. Items are classified as nonmachinable if they are:
- Square-shaped envelopes (e.g., 6" x 6" invitation envelopes).
- Rigid or inflexible (containing stiff cardboard, wooden keepsakes, or plastic cards).
- Lumpy, uneven, or sealed with clasps, string ties, ribbons, or wax seals.
- Addressed vertically (parallel to the short edge).
Pro Tip for Formal Invitations: If you choose to seal an invitation with an elegant wax stamp or decorative bow, place the embellished piece inside a protective outer mailing envelope. This keeps the wax seal pristine while ensuring the outer surface remains smooth and machinable.
Security and Tracking Upgrades
Professional correspondence often involves critical documentation that benefits from additional tracking services:
- Certified Mail: Provides legal proof of mailing and verified delivery confirmation, widely used for legal filings, tax notices, and formal compliance letters.
- Return Receipt: An optional add-on to Certified Mail that provides the sender with either a physical green postcard or an electronic PDF signature record verifying receipt.
- Signature Confirmation: Requires the delivery carrier to obtain a recipient signature before handing over the envelope.
When using these services, ensure the green barcode tracking label is positioned along the top edge of the envelope to the left of the stamp zone, leaving the central delivery address block completely unobstructed.
Frequently Asked Questions About Envelope Addressing
Should you include punctuation when addressing an envelope?
For standard automated business mailings, postal authorities recommend omitting punctuation marks such as periods and commas in the address block. Write APT 4B rather than Apt. #4-B, and write GRAND RAPIDS MI 49503 rather than Grand Rapids, MI, 49503. The only recommended punctuation mark is the hyphen within a 9-digit ZIP+4 code (e.g., 49503-1234). For guidance on formal writing and address citations in publications, see the university address formatting style guidelines.
Where should the apartment or suite number be placed on an envelope?
Place the apartment, suite, floor, or unit designation on the same line as the primary street address, positioned at the end (e.g., 120 MONROE CENTER ST NW STE 300). If the street address is exceptionally long, place the unit identifier on the line directly above the street address—never below it.
What happens if an envelope is addressed incorrectly or missing a return address?
If sorting machinery cannot decipher an address, the envelope is routed to human clerks for manual review. If the address remains unverifiable and lacks a readable return address, the piece is sent to the postal service's Mail Recovery Center, where it may eventually be opened to identify the sender or securely shredded. Providing a clear return address guarantees that any undeliverable letter will be returned to you.
Conclusion
Mastering the rules of envelope addressing ensures your professional correspondence arrives quickly, reliably, and with the polished presentation your brand deserves. At Swift Printing, we are a high-end print shop setting the standard for printing in the boutique business across Grand Rapids, Ada, Rockford, Belmont, Kalamazoo, Lansing, and throughout West Michigan. We work closely with law firms, medical groups, consultancies, and government agencies to ensure every corporate mailpiece reflects refined quality and rigorous technical accuracy.
Whether you need bespoke foil-stamped stationery, custom business envelopes, or end-to-end direct mail execution, our team is here to help. Get in touch with us today, or explore our guide on formatting a spreadsheet for a bulk mailing project to streamline your next campaign.