How to Prepare a Canva File for the Print Shop
Canva can be a wonderful resource for anyone wanting to make their digital and print materials look awesome. It’s so easy to use that almost anyone can use it. There are so many templates that you can look like an expert in design in only a few minutes.
However, if you’re not a trained designer it can be difficult to make sure you send the files to the printer in the bet possible way so that your work looks great on a digital screen and on paper as well. We get it - you’re a small business or nonprofit that operates on a nimble staff and budget and wants to be able to streamline the design work. We created this simple how to guide on how to download files from Canva for printing. (Oh, and we made the guide using Canva… imagine that.)
The artwork and images needs to be 300 dpi or higher
When you create something for “digital use” aka to only be viewed on a screen, you want it to be the lowest resolution as possible without being grainy on the screen. That is because you want that image to load as fast as possible so that someone doesn’t scroll past your artwork while they are waiting for it to load.
When it comes to printing however, you want a high resolution - at least 300dpi for all parts of the document/file. Images that are at 300 dpi will print clearly on our large format presses, digital presses and offset presses.
This means that all photos or logos that you add to the layouts or templates are high resolution too.
Using high res images and logos can take a bit of time to hunt them down and set them up. In the long run it always pays off to do the leg work to get the high resolution images. It really makes sure your images are all crisp when printed and it helps solidify your brands image and consistency.
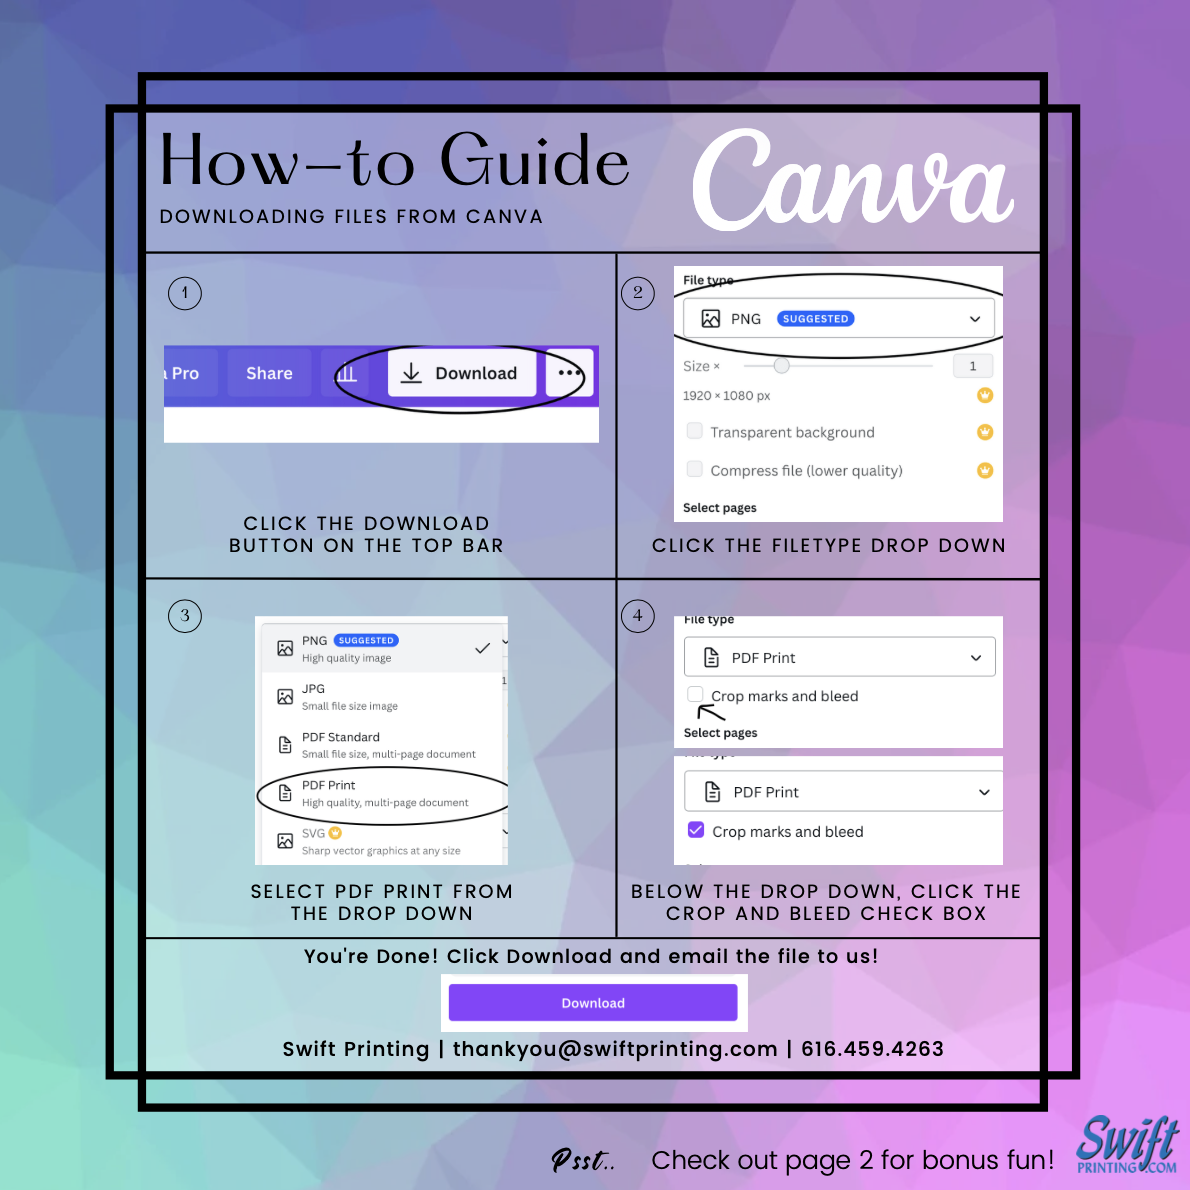
We suggest doing a high res PDF with crop and bleed marks. Canva has those options.
How to download the high res file from Canva:
Click the download button on the top bar
Click the file type drop down
Select PDF Print from the drop down
Below the drop down, click the crop and bleed check box
Click download
Canva and Pantone
Canva does allow you to input your brand Pantone colors. However when it is exported, it changes Pantone colors to RGB. If we’ve done any printing for your company in the past using Pantone colors, this can create some discrepancy. We do our best to match regardless, however you should be aware that anything printed from Canva in RGB will not 100% match previously printed items with Pantones embedded.
Other Tips and Trick for your files to look their best while using Canva:
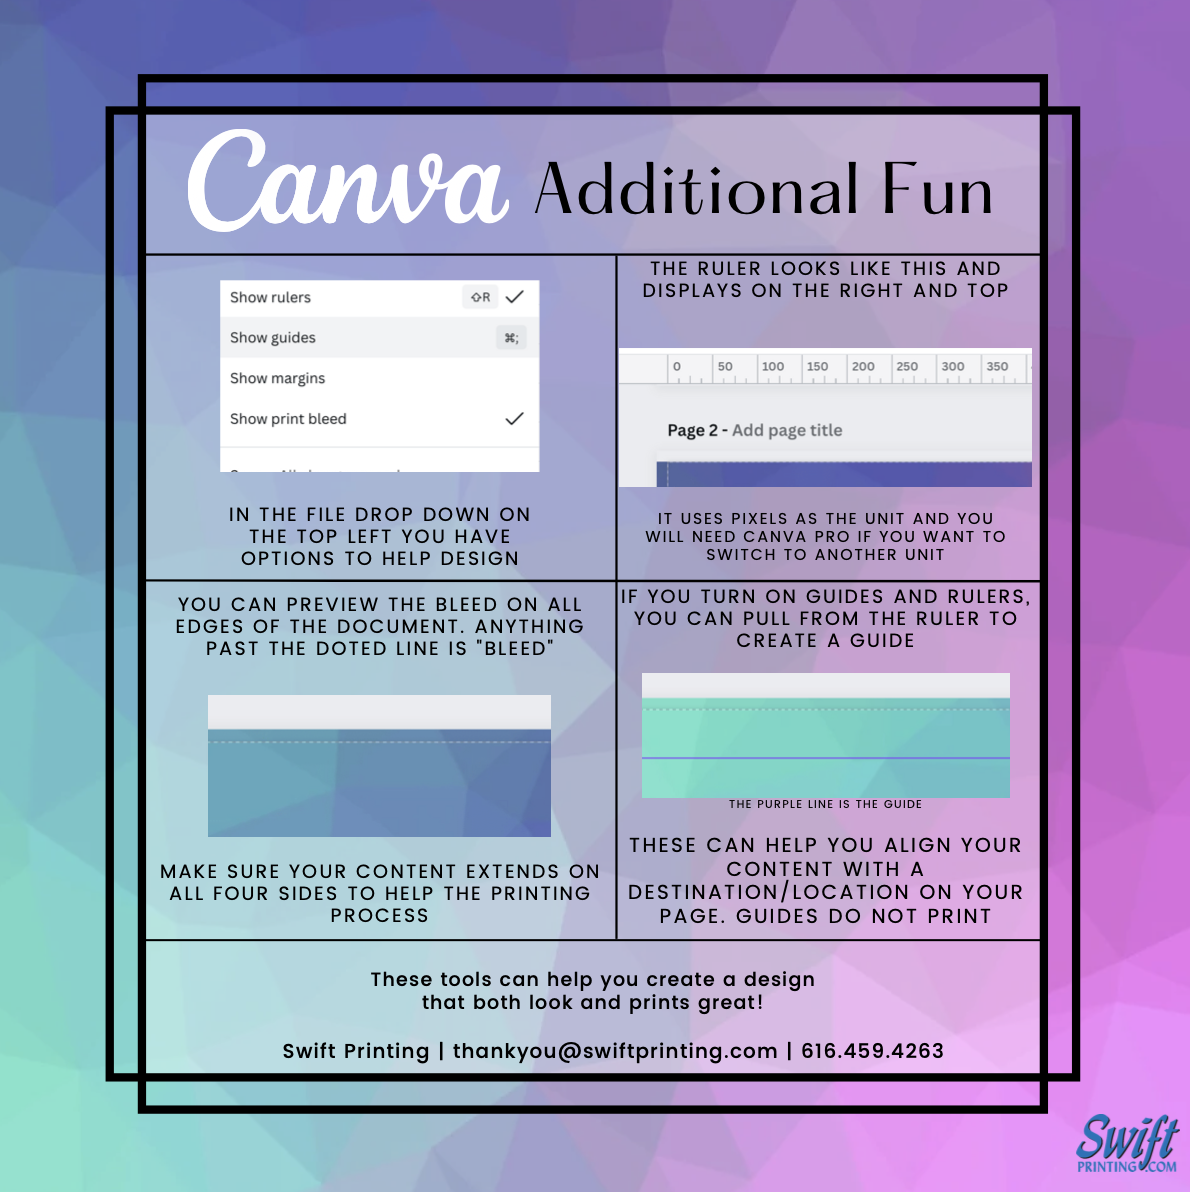
In the file drop down on the top left side of Canva application you have some options to help you design better. Showing the rules and guides as well as the bleed can help you set up your document even better and with consistency.
Rules & Guides:
The free version of Canva uses pixels as the unit of measure. If you want to switch it to another unit of measure you’ve got to upgrade to the Canva Pro.
You can preview the bleed on all edges of the document. Anything past the doted line is the “bleed”. You want the bleed to be on all four sides of the documents for the best printing outcome.
Guides do not print and can be a great tool to help you align your content.
Canva can be a low budget way for anyone to create wonderful designs when setting up the file properly and downloading it in the proper format. Using high resolution images that are at least 300 dpi are a must. Whether you’re in need of fast printing, invitation printing, printing a local guide program, or needing a copy center-Swift is where to print and Canva is a great tool for small businesses and nonprofits to utilize.